In Running LLMs in Intel Laptops we installed and ran an LLM in a laptop and use it as as your personal chatbot. Let’s push this further by using the LLM to help us write code by connecting our IDE (Integrated Development Environment) to the model.
In the previous article we installed the Qwen 2.5 7B Instruct model, although for our IDE use case we will be using another variant of the Qwen model called Coder. It is important to understand that a model can have several variants that is more suited for a specific task. For instance:
- The Instruct model is better at general purpose conversations and broad knowledge
- The Coder model is better at understanding the codebase and generating code
The model variants have different strengths based on what training data is used. It is important to use the appropriately-trained model to get the most out of the LLM for our use case.
To install the Qwen Coder model, we use the same optimum command we used last time:
optimum-cli export openvino `
  -m Qwen/Qwen2.5-Coder-7B-Instruct `
  --task text-generation-with-past `
  --weight-format int4 `
  qwen25-coder-7b-ov
Exposing a REST API
Now we have a problem: how can the IDE “talk” to this model? In our chatbot app we use Gradio to interact with the model. In an IDE, we need more than a chat interface in order to communicate effectively.
IDEs communicate to LLMs using APIs. Which means we also need to set up our own API endpoints so that the IDE can “talk” to the local LLM. One way to do this effectively is to set up OpenAI-compatible API endpoints, which can then be plugged to systems that can already communicate with OpenAI models (like GPT).
We will use Visual Studio Code (VS Code) as the IDE as it has a rich ecosystem of plugins we can use. For the API, we will be implementing the following OpenAI-compatible endpoints at the minimum:
GET /v1/models-
POST /v1/chat/completions
For the authentication, we will use our own API key (e.g. local-dev-key) as the Bearer token. To serve HTTP requests, we will use a web server called uvicorn, which is a lightweight ASGI (Asynchronous Server Gateway Interface) web server for Python.
To install uvicorn:
pip install fastapi uvicornNext we will create a simple Python web application that can serve HTTP requests and perform additional logic. As an example, you can refer to the local_openai_server.py file, which already has the components we need to make the integration work.
In the sample app, we set the API Key to local-dev-key. We use this same key in the IDE to authenticate against the OpenAI-compatible endpoints. To start the uvicorn server and run our app:
$env:LOCAL_OPENAI_API_KEY="local-dev-key"
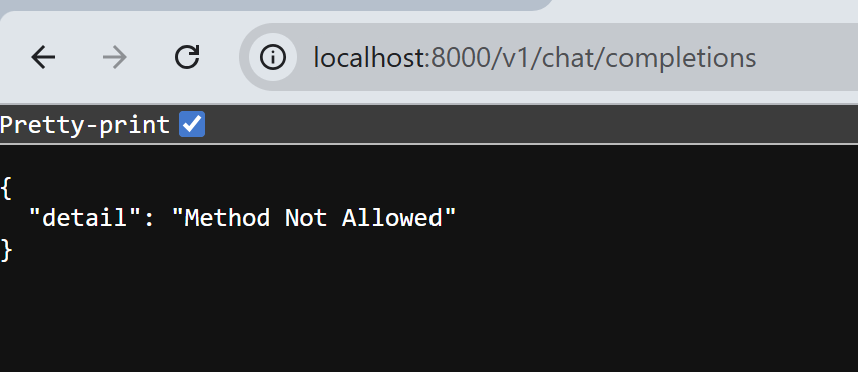
python -m uvicorn local_openai_server:app --host 127.0.0.1 --port 8000You can confirm that the server is running by accessing localhost:8000 with your browser.
Now that we verified that the LLM is accessible via the endpoint, we can now hook it to our IDE.
IDE Configuration
VS Code by itself can connect to OpenAI-compatible endpoints (and thus can use our local LLM), but as of this writing, you will need a Github Copilot license to do this. As I am using a bare installation of VS Code, we will use an extension called Continue. Continue is an open-source AI assistant that allows you to easily swap any LLM (local or cloud) into VS Code.
Connecting our local LLM using Continue is as simple as updating the extension’s settings (settings.yml). Under the models section, add an entry called Local Qwen Coder.
name: Local Config
version: 1.0.0
schema: v1
models:
  - name: Llama 3.1 8B
    provider: ollama
    model: llama3.1:8b
    roles:
      - chat
      - edit
      - apply
  - name: Local Qwen Coder
    provider: openai
    model: qwen25-coder-7b
    apiBase: http://127.0.0.1:8000/v1
    apiKey: local-dev-key
    roles:
      - chat
      - edit
      - apply
      - autocomplete
    capabilities:
      - tool_use
    defaultCompletionOptions:
      maxTokens: 800
      temperature: 0.0
Some important fields to consider are:
provider – by setting this to openai, it instructs the IDE to treat this as an OpenAI-compatible endpoint.
apiBase – http://127.0.0.1:8000/v1 points to the uvicorn server that we started to serve the requests to the LLM.
roles – indicates which modes the LLM can be used for: Ask mode (chat), Agent (edit), or Tab (autocomplete).
capabilities – this is the critical configuration to ensure the IDE integration is working. By not specifying that the LLM can use tools (tool_use), files cannot be created or edited when using Agent mode.
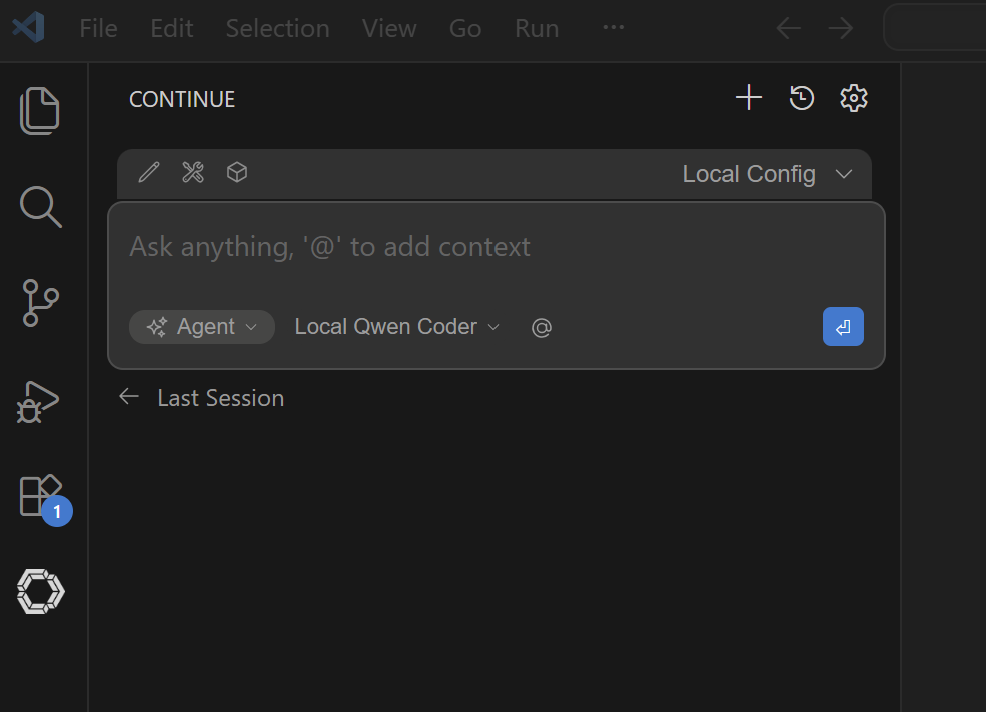
Restart VS Code to ensure the new settings are applied. If the settings are loaded correctly, you will see Local Qwen Coder as one of the model options:
Prompts are not simple
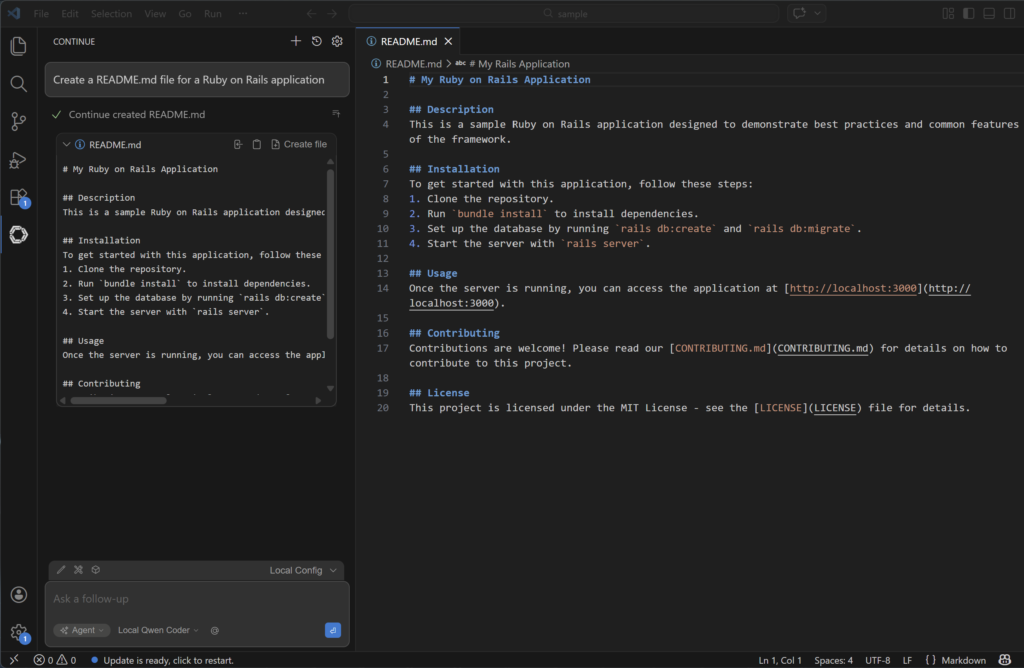
Since the LLM configuration is set up, we can start coding! As an example, we asked the local LLM to generate a sample README.md file for a Ruby on Rails application.
Create a README.md file for a Ruby on Rails application
This simple prompt you see in the IDE is not what the LLM sees. Inside the local_openai_server.py app, you will see that there are a lot more information added to the initial prompt in order for the LLM to respond like we want it to.
There are system instructions to guide the LLM on how to respond as a coding agent:
<important_rules>
  You are in agent mode.

  If you need to use multiple tools, you can call multiple read-only tools simultaneously.

  Always include the language and file name in the info string when you write code blocks.
  If you are editing "src/main.py" for example, your code block should start with '```python src/main.py'

  For larger codeblocks (>20 lines), use brief language-appropriate placeholders for unmodified sections, e.g. '// ... existing code ...'

  However, only output codeblocks for suggestion and demonstration purposes, for example, when enumerating multiple hypothetical options. For implementing changes, use the edit tools.
</important_rules>
And then the list of available tools are also sent so that the LLM can decide which tool to use to be able to respond to the prompt:
You may call one or more functions to assist with the user query.

You are provided with function signatures within <tools></tools> XML tags:

<tools>
  {
    "type": "function",
    "function": {
      "name": "read_file",
      "description": "Use this tool if you need to view the contents of an existing file.",
      "parameters": {
        "type": "object",
        "required": [
          "filepath"
        ],
        "properties": {
          "filepath": {
            "type": "string",
            "description": "The path of the file to read. Can be a relative path (from workspace root), absolute path, tilde path (~/...), or file:// URI"
          }
        }
      }
    }
  },
  {
    "type": "function",
    "function": {
      "name": "create_new_file",
      "description": "Create a new file. Only use this when a file doesn't exist and should be created",
      "parameters": {
        "type": "object",
        "required": [
          "filepath",
          "contents"
        ],
        "properties": {
          "filepath": {
            "type": "string",
            "description": "The path where the new file should be created. Can be a relative path (from workspace root), absolute path, tilde path (~/...), or file:// URI."
          },
          "contents": {
            "type": "string",
            "description": "The contents to write to the new file"
          }
        }
      }
    }
  }
</tools>
In the above example, the tools read_file and create_new_file is sent to the LLM, and when we prompted the IDE to create the README.md file, the LLM was able to call the create_new_file tool and set the arguments accordingly. For example:
{
  "name": "create_new_file",
  "arguments": {
    "filepath": "README.md",
    "contents": "This is a sample Ruby on Rails application..."
  }
}
The harness is the key
Let’s explore more what is going on with the sample web app we used to integrate with the local LLM.
TOOL_USE_SYSTEM_PROMPT = (
    "You are a coding assistant operating in agent mode. "
    "You have access to tools to read and write files. "
    "CRITICAL RULES:\n"
    "- You MUST use tools to perform actions. NEVER describe or simulate actions in text.\n"
    "- NEVER say 'I have created', 'I have saved', or 'I have updated' without calling a tool.\n"
    "- NEVER output file contents in a code block as a substitute for calling a tool.\n"
    "- When asked to create or edit a file, respond ONLY with the tool call JSON. No prose before or after.\n"
    "- After a tool result is returned to you, respond with a short plain text confirmation. Do NOT call the tool again.\n"
    "- A tool call must be a raw JSON object in this exact format:\n"
    "```json\n{\"name\": \"tool_name\", \"arguments\": {\"param\": \"value\"}}\n```"
)
There are explicit system prompts that we send to the LLM to ensure that the answers are concise and not rambling. For example, when a tool is invoked, the LLM should only respond with a valid tool JSON response, and not add text before or after. This is very different from a general chat app like ChatGPT.
There are also code that makes the LLM behave what we expect a coding assistant would be. For example:
def maybe_inject_tool_reminder(messages: List[Dict[str, str]], tools) -> List[Dict[str, str]]:
    """
    If the last user message implies a file action and tools are available,
    append a reminder right before generation so the model doesn't respond in prose.
    Skip if the last message is a tool result — the model should wrap up, not call again.
    """
This ensures that the LLM does not fall into an endless loop of invoking a tool, seeing the tool output, and then calling the tool again as it parses it from the message.
The sample app we are using covers only very basic aspects of a coding assistant. There are a lot more complexity that is involved when using LLMs to generate code:
- Tools are not just limited to reading or writing files. Sometimes we also need to search the filesystem, browse the internet, or using git commands. Your app should be able to handle all these tools.
- Each model has its own way of responding to messages. In our example we are using Qwen Coder, and the sample app’s parsing logic is specific to Qwen. If we want to support another open-weight model like Codestral, then we also need to write the code to handle the parsing and formatting of the LLM response.
This exercise showed me that there is a lot going on under the hood for AI IDEs like Cursor, and there is a reason why these are paid products. LLMs are text-focused generative AI. LLMs are also non-deterministic. But for coding, we want to make it behave more deterministically. The “secret sauce” then for an effective coding agent is the ability to set constraints and guardrails, as well as proper formatting and parsing of text output.