In recent years, it became easier and simpler to deploy and publish your application in the internet. Previously, you will need to purchase your own virtual machine, install libraries and then configure to deploy your application. This requires money, time, and expertise if you decide to do it yourself. Today there are lots of free (or cheap) services that will build and deploy your application in a click of a button or a code update.
In this article we will explore how we can deploy a simple frontend JavaScript application in AWS Amplify. While Amplify supports both frontend and backend services, we will focus on the frontend part. This is simpler to set up and already opens up a wide range of applications: your resume, portfolio, product page, and so on.
AWS Amplify
AWS Amplify is a set of tools that enable you to build and deploy your web or mobile application in the cloud easily. It has both frontend and backend service components such as authentication, storage, pub/sub, etc. All of the services are backed by other AWS services, such as Cognito for authentication, S3 for storage, and so on.
Using Amplify, you can have your application deployed in the cloud with these benefits:
- CI/CD – automatically build and deploy your application just by pushing code
- Free SSL certificate – whether you are using the default amplifyapp.com domain or your own custom domain
- Global CDN – your site will be deployed behind CloudFront
- Subdomain and branch controls – you can set up subdomains that are automatically deployed from a specific branch. This is useful for staging or development setups.
Create your repository
To start, let’s first create a simple JavaScript application in React. We will be using create-react-app to make it simple and fast.
We will need to have the basic dependencies in our local machine first. Install Node which includes the npm and npx libraries that we will use to generate the initial code for our application.
npx create-react-app myapp
cd myapp
npm start
The local web server will run automatically if everything is set up correctly. If you go to http://localhost:3000 in your browser you will see this welcome page:
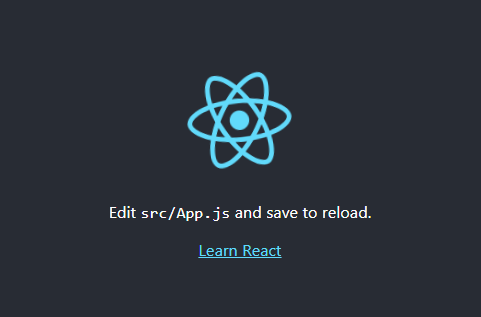
From here, you can start updating the main App.js file and add in your custom components and content as needed.
Create the repository in a Git hosting service, such as Github. Push your code into this repository. Amplify supports both public and private repositories, so set up the repository permissions accordingly.
Set up your website in Amplify
Now that we have our code repository set up, we can now connect it to Amplify. In the Amplify dashboard, you will see two choices:
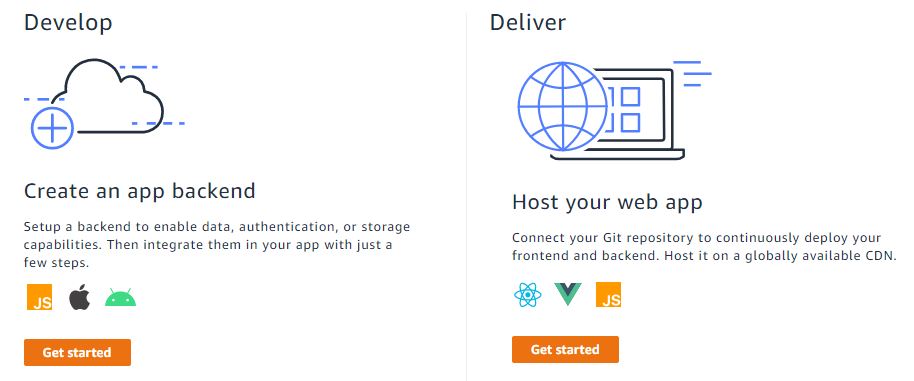
Develop – if your application requires a backend component, such as authentication, storage, or functions, then you will need to select this. For a mobile application, this is the option to choose.
Deliver – this is what you need if your application is web-based only. Our example, which is a simple React application, is perfect for this case.
Next, we need to connect the repository that we created earlier to Amplify. This is done by authorizing AWS Amplify to integrate with your repository account, e.g. Github. This will allow Amplify to list your repositories, detect if there are any code changes, and then pull the latest code automatically.
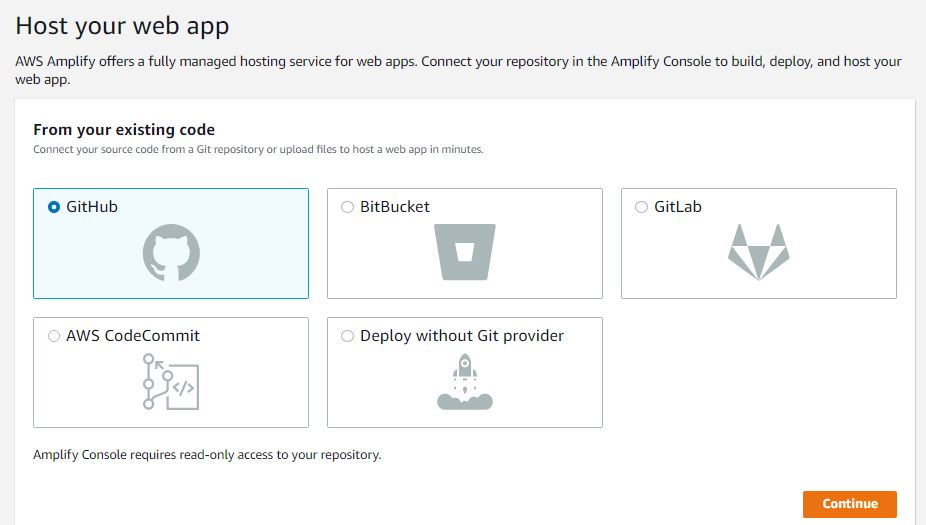
Once the Git account is connected, you can now select the repository that will be used to build and deploy your application.
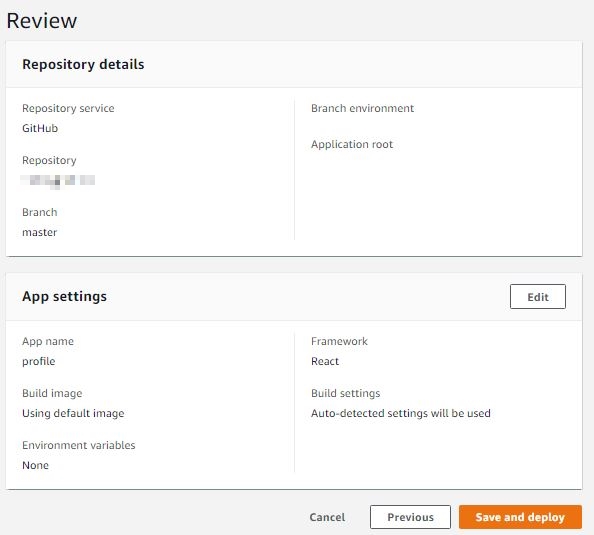
In our example above, the branch that is used by default is the master branch, but this can be updated later. Under App settings you will notice that Amplify automatically detects how your application was built. In our example, it detects that the application was built using React.
Using the default settings, Amplify automatically creates this build script that should be good enough for a standard React application.
version: 1
frontend:
   phases:
     preBuild:
       commands:
         - yarn install
     build:
       commands:
         - yarn run build
   artifacts:
     baseDirectory: build
     files:
       - '**/*'
   cache:
     paths:
       - node_modules/**/*
You can also opt to customize this build script to change any steps and behavior as needed. There are two ways you can customize the build script:
- Edit the file in App settings -> Build settings in the AWS Amplify Console
- Download the file and save it as amplify.yml in the root directory of your repository
Deploying your Application
Now that we have connected our repository to Amplify and set the build settings, we can now start deploying our application. Note that the first time you connect your repository, Amplify will attempt to deploy your application based on the framework that you used. This is how it was able to create the initial build script file.
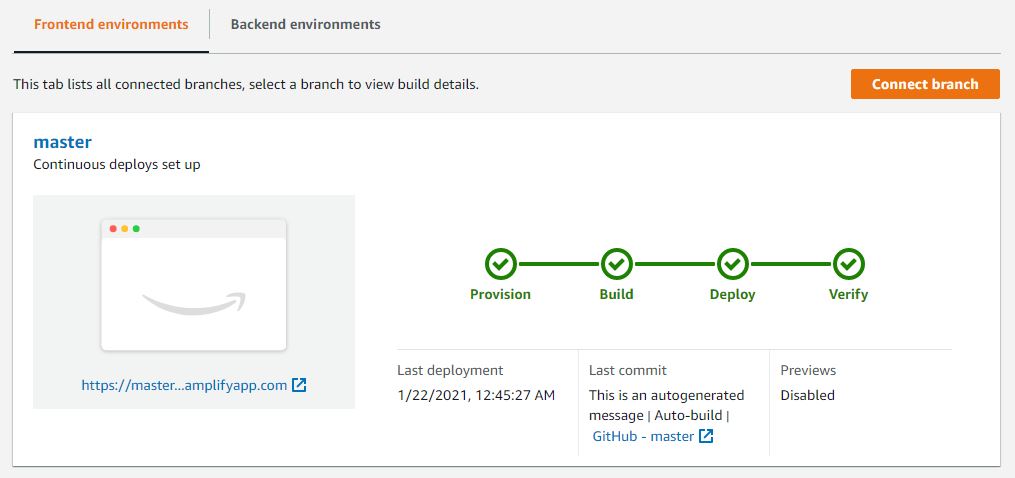
Once this is set up though, deploying your application is as easy as pushing your code to the repository. Amplify knows when new code is pushed to the branch (master) and then starts building the code using that branch. All code changes pushed to the master branch will trigger the build and deploy.
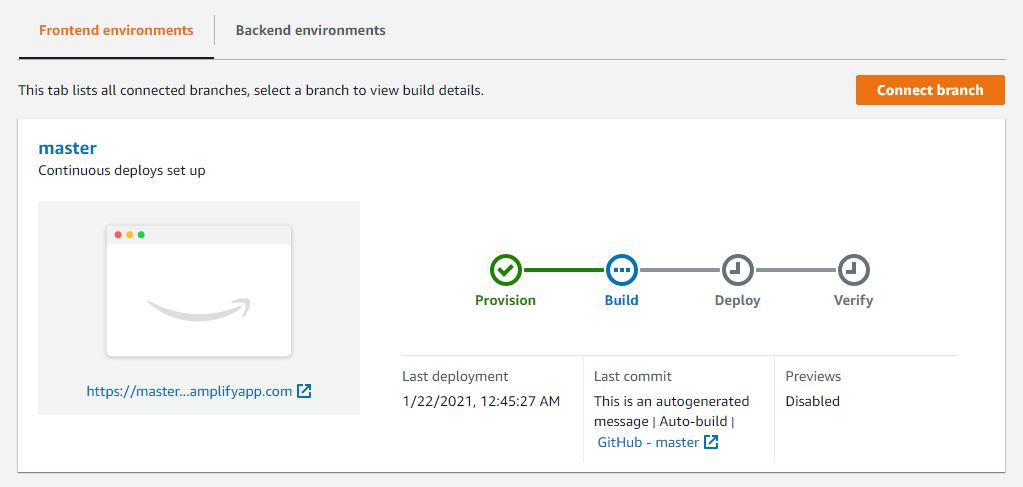
You can go to the AWS Amplify dashboard to see the status of your latest deploy. If the deploy is successful, you will see that all steps from Provision to Verify will be colored green. A preview/snapshot of your application will be shown in the left hand side of the page as well.
You can set up multiple deployment pipelines for different code branches. In addition to the default master branch, you can also add a pipeline for a staging environment by configuring a different branch, let’s say test or staging.
Use a custom domain
By default, Amplify will deploy your application using its own domain, with the branch name included in the URL. The format for the default URL is:
<branch name>.<hash>.amplifyapp.com
In the example above the URL could look like https://master.d2my3r29lzn7n0.amplifyapp.com
This works for temporary pages or for testing purposes, but usually we want to use our own domain for our application. You can do this by setting up a few DNS records. In addition, SSL will also be automatically configured for your domain. This SSL certificate will be managed and renewed by AWS, so this is another task you no longer need to worry about.
Go to the Domain Management section in the Amplify Console.
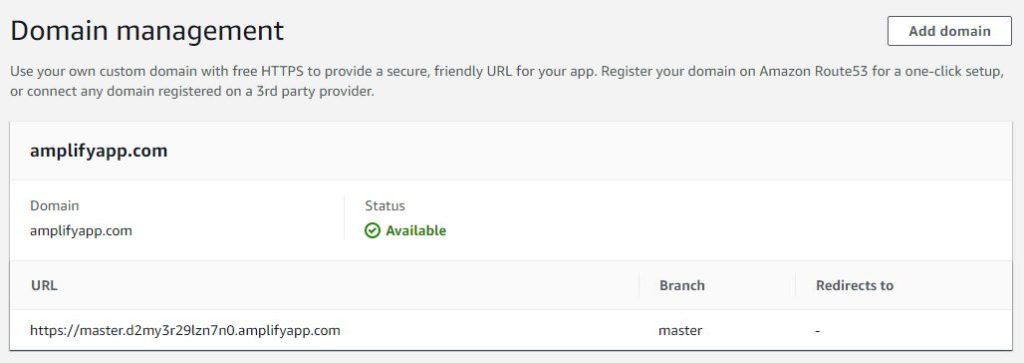
It will show the default domain (amplifyapp.com) and the auto-generated URL for your application. Click the Add domain button.
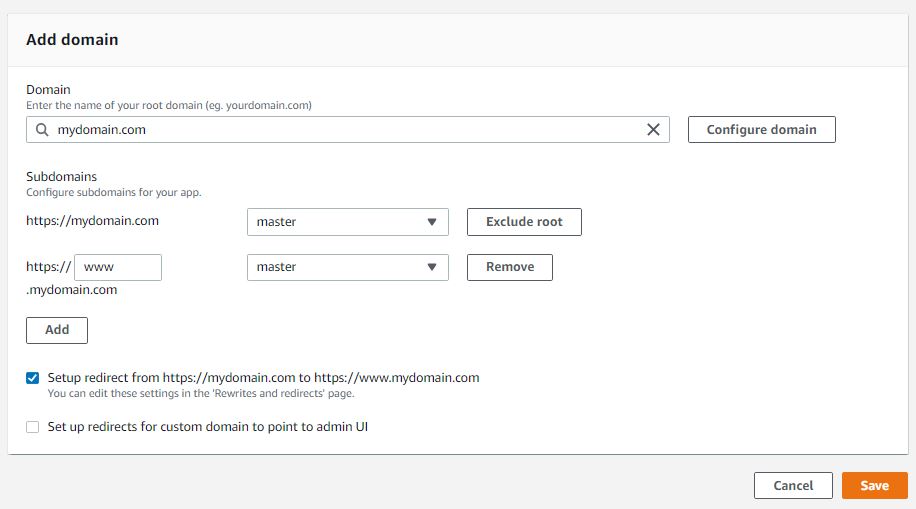
Enter your custom domain (the root domain) under the Domain field. In the Subdomains section, you can specify additional subdomains for your application, each with a specific target branch. This is where you can set up your staging or test domains that point to your test branch. Once you are finished, click Save.
Amplify will indicate the DNS configuration you need to add to your domain records. This ensures that you really own the domain you used.
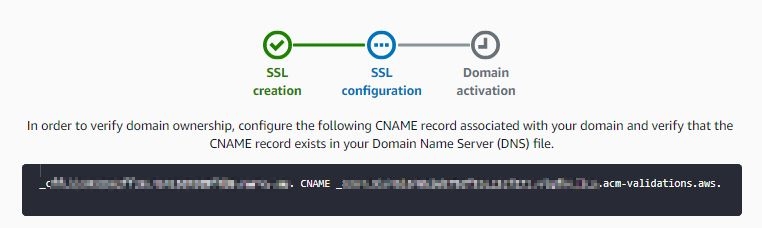
Go to your DNS service provider where your domain is located and then add the CNAME records as shown like in the screenshot above. The Amplify Console will automatically detect the DNS changes and check if they are set up correctly.
Subdomains
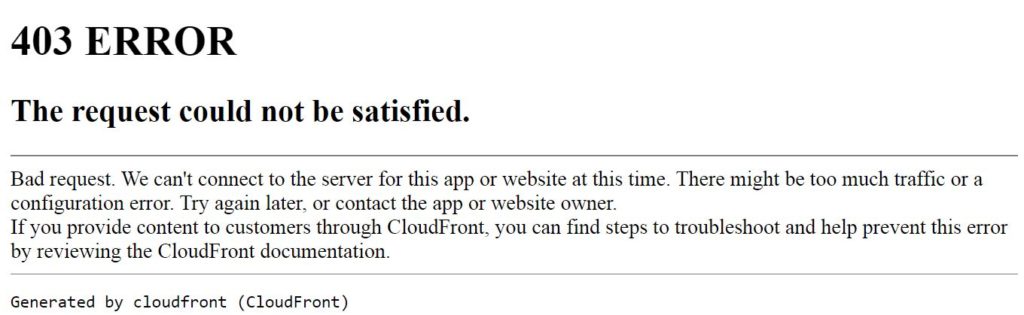
If you added a custom subdomain for your application, this requires a separate CNAME record that need to be added under that subdomain. If you try to go to the subdomain without doing this step, it will show you an error page:
The Amplify Console will also tell you that the CNAME record has not been applied yet for that subdomain:
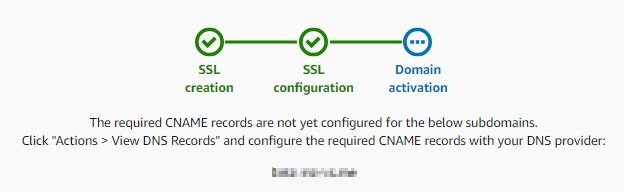
Changing the DNS records under the subdomain will resolve this and will be automatically detected by Amplify. You will also notice that the CNAME record is actually a CloudFront URL. This means your application is running with a global CDN built in!
Next steps in Amplify
If your application is just a simple web page, then you can stop at this point and take advantage of the benefits of using Amplify (CI/CD, CDN, SSL). However, if you want to grow your application further, you can then start using the backend features of Amplify (storage, authentication, etc). This is a great way to jump start your ideas and projects without worrying about hosting and deployments.