In the previous article we discussed how requests through the Internet are protected using HTTPS. This is made possible through the use of TLS Certificates. In this article we will discuss what these certificates are, the different types, and how anyone can use them for their own web application.
TLS certificates
To establish a secure communication between a browser and the server, the first step is to do what is called a TLS handshake. In this process, the public key of the server is used to generate the key that is used for symmetric encryption. This public key is shared using a TLS certificate.
These certificates enable the use of HTTPS in the Internet through the following:
- Privacy – it contains the server’s public key that is used for encrypting the requests
- Integrity – once the session between the browser and the server is encrypted, the data cannot be tampered in transit
- Identification – ensures that the browser is communicating with the server that has the right key/domain information
There are many types of TLS certificates, each with varying levels of validation.
Domain validation
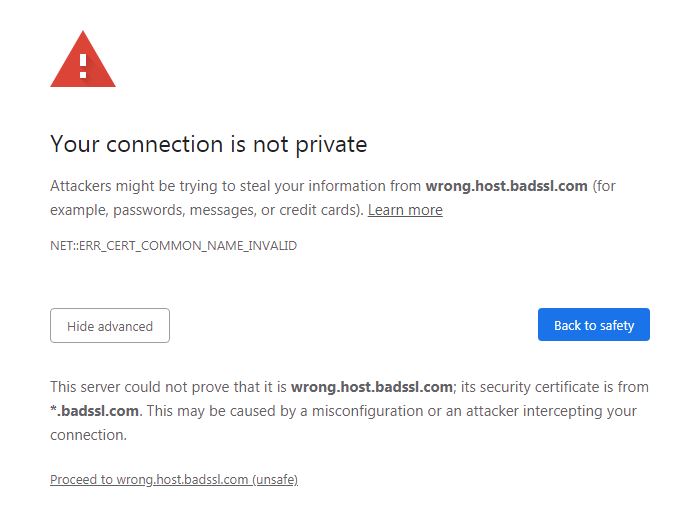
This is the most common type which basically just confirms that the certificate is made for a specific domain. For example, if you go to google.com, the TLS certificate that the Google server provides must indicate that it is a valid certificate for the google.com domain. If these do not match, browsers will usually prevent the page from loading for security reasons.
Organization validation
The next certificate level is Organization Validation. In addition to verifying that the domain name is correct, other details are provided which proves that the organization indeed owns the domain name.
Extended validation
The most extensive certificate level is called Extended Validation (EV). Only specific Certificate Authorities (CA) can provide these types of certificates, which (in theory) provides more assurance that the organization owning the domain name is legitimate.
However, this does not mean that it is more secure. The process in getting an EV certificate is not restrictive enough. This allows scammers and other malicious agents to obtain one and lure victims into thinking that they are a legitimate entity.
In previous years, a domain using an EV certificate shows a special green bar in the URL field of a browser that indicates the organization name. However, due to the potential issues described above, this is no longer the case and EV certificates are used less frequently today. A normal domain-validated certificate now shows up in the same way as an EV certificate in the URL field of a browser.
Wildcard Certificates
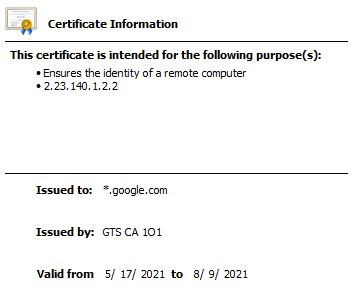
TLS Certificates can also be a single-domain (standard) or a wildcard certificate. If you set up a certificate for a domain, for example, myapp.com, then the TLS certificate will only be valid for that exact domain. If you are using subdomains, such as test.myapp.com or beta.myapp.com, you will not be able to use the same certificate for these as they are considered as different domain names.
To include subdomains in your TLS certificate, you will need to set it up as a wildcard certificate. With this, all subdomains under your domain can use the same certificate and thus eliminate the need to set up a certificate for each one. The difference lies on how you set up the Common Name in the certificate.
For a standard certificate:
Common Name: myapp.com
For a wildcard certificate:
Common Name: *.myapp.com
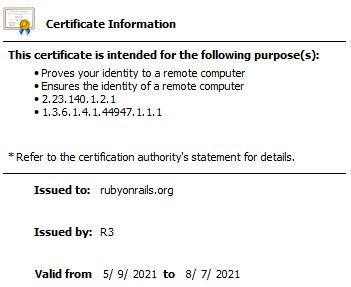
If you purchase a TLS certificate from a Certificate Authority, usually the price of wildcard certificates are higher than standard ones. A service called Let’s Encrypt allows you to create both standard and wildcard certificates free of charge.
Certificate Authority
TLS certificates are not a closed, proprietary system. Technically, we can create our own TLS certificate and it will provide the encryption that we need for HTTPS. However, in addition to the goals of HTTPS for Privacy and Integrity, we must also consider Identification. If anyone can create TLS certificates, then there is no stopping fraudsters from impersonating a legitimate website.
To solve this problem we have entities called Certificate Authorities (CA). These are third-party organizations that issue certificates to users and other organizations. They provide proof that the TLS certificate is valid for a specific domain. Some examples of CAs are Comodo, DigiCert, Godaddy, and Let’s Encrypt.
Root Certificates
The reason why CAs are able to generate (and sell) TLS certificates is because they have something called a Root Certificate. When you install a browser, it comes equipped with a list of trusted Root Certificates. When a TLS certificate from a server is checked, it follows a trail of certificates (called a certificate path) from how that certificate was generated until it arrives at the Root Certificate. It then compares that Root Certificate to the list of trusted ones. If it is included in the list, then the browser knows that the TLS certificate can be trusted as well.
Self-generated Certificates
Technically, you don’t need a Certificate Authority to generate a TLS Certificate. You can use open-source tools like OpenSSL to set up and create your own certificate. As it is using the same asymmetric encryption method, self-generated (or self-signed) certificates are as secure as their paid counterparts from CAs.
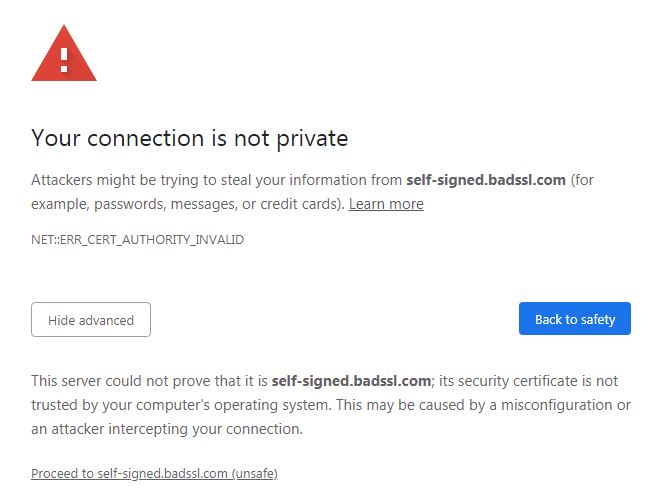
If you can generate your own certificate, then why do you still need to get one from a CA? It is because your self-signed certificate does not have a trusted Root Certificate in its certificate path. If you try to use it for your application in the Internet, it will not be loaded by browsers as it will indicate that the TLS certificate is not trusted.
Self-generated certificates are still useful for testing applications in your local environment as well as for applications within an internal network. Applications can opt not to check whether a certificate is trusted or not, and so these can have cost savings, provided that requests are only within an internal network.
HTTPS for Everyone
In previous years, HTTPS was not as prevalent as it is today. To be able to have HTTPS enabled on your website, you will need to purchase a TLS certificate from a Certificate Authority (as self-generated certificates are blocked by browsers). This additional cost hindered the use of HTTPS, and in turn posed a serious security hole in the Internet itself.
Today, anyone can enable HTTPS for their own website or application using a service called Let’s Encrypt.
Let’s Encrypt
Launched in 2016, Let’s Encrypt is non-profit CA run by the Internet Security Research Group (ISRG). The ISRG involves organizations such as Mozilla and the Electronic Frontier Foundation (EFF).
Let’s Encrypt provides a 90-day TLS certificate free of charge. The certificates are domain-validated only and does not support organization validation. In addition to standard certificates, you can also create wildcard certificates using the service.
Certbot is a free tool developed by the EFF that allows for easy management of Let’s Encrypt certificates. If you have SSH/shell access to an instance, then you can set up and renew your TLS certificates using this tool.
Certbot supports many operating system/web server configurations, such as Apache and Nginx on Windows and Linux systems. Thus it is likely that your web application can already be set up to use HTTPS using this tool.
Certbot on Nginx
As an example, let’s say you have a server with an Ubuntu operating system. Your web server of choice is Nginx. Here are the steps on how to install and set up Certbot.
Install Certbot
The official documentation for Certbot can be found here. It recommends installing it via snap, however, you can also use apt to install it using this command:
sudo apt install certbot python3-certbot-nginx
Configure Nginx
Usually you have to update your Nginx configuration file to add directives for HTTPS. Certbot makes this extremely simple by just one command:
sudo certbot --nginx -d myapp.com -d www.myapp.com
With this one command, Certbot already handles the heavy lifting of configuring your application. This includes the following actions:
- Verify domain ownership
- Generate the TLS certificate and private key
- Store the certificate in your server
- Modify nginx.conf to use the location of the TLS certificate and enable HTTPS
- Reload the Nginx configuration
- Set up automated renewal (via systemd or cron)
Renewing TLS Certificates
Let’s Encrypt generates a certificate that is valid for only 90 days. This is to encourage users to automate the certificate renewal, and also increase security as the certificate is constantly being updated.
As we have discussed previously, Certbot already handles renewals by setting up a systemd or a cron job. While this is executed on a regular schedule, the certificate only gets renewed if the expiry date is within 30 days.
To confirm that the renewal script works without any errors, Certbot provides a dry-run option that you can manually run:
sudo certbot renew --dry-run
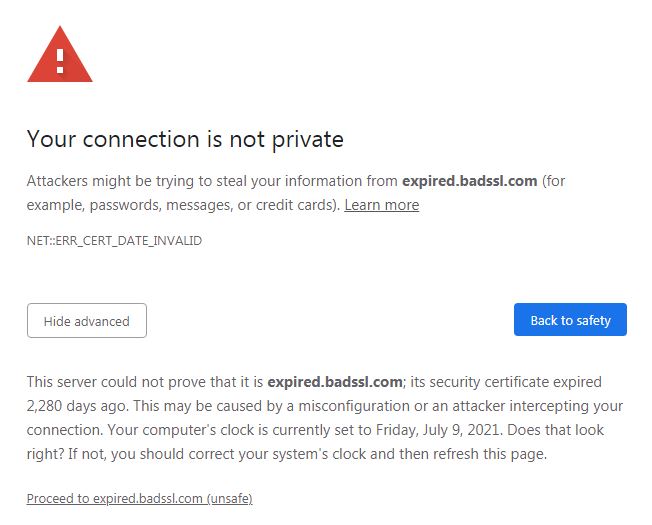
If you don’t see any errors in the dry-run, then you can be confident that Certbot can automatically renew your certificate and avoid an expired certificate issue down the road (shown below).
TLS certificates perform an important role in securing the Web and the Internet in general. While you can still purchase these certificates, HTTPS can now be used by more applications and services through free-to-use TLS certificate providers like Let’s Encrypt.