Rubocop + vim

Rubocop + vim

Code linters such as Rubocop ensure consistent, clean code throughout your application. If all developers are using the same linter configuration, then you can be sure that any code that you encounter is organized in the same way regardless of the author.

One challenge in using linters is that it should have immediate feedback, or else it may disrupt the coding flow of the user. For example, you can run the linter manually after you make your changes, but as this is a manual process it can be easily forgotten. Continue Reading

DelayedJob Survival Guide

DelayedJob Survival Guide

One day at work I noticed that emails were taking much longer to be sent out from our app. I narrowed down the problem to our background queue which is responsible for sending out the emails. The solution prompted me to write this DelayedJob “survival guide”to help others who may encounter this issue in the future.

Asynchronous processing/background processing is an important part of a web application. This ensures that running code is not blocking the rest of the process if that code does not need to run synchronously. Common examples are sending emails or code that depends on a third-party API or service.

There are many solutions for this, such as Redis-backed programs like Sidekiq or Resque. There are also database-backed programs like DelayedJob. The advantage of using a database-backed solution is its simplicity: you don’t need an external dependency (such as Redis) to run it. Instead, you can use your existing database to manage your background processing.

This simplicity also has a disadvantage: you are now constrained by your database and database issues can directly affect your background processing.

The Problem

We had a new feature which required processing old data in the system. This uses the background queue as it takes a few seconds to process each individual task. Eventually these tasks accumulated, resulting in more than half a million jobs in the DelayedJob queue.

As I noticed that the queue is not getting processed as fast as I expected, I looked at the database logs. In the MySQL slow query logs, I noticed that almost all entries look like this:
UPDATE delayed_jobs
SET `delayed_jobs`.`locked_at` = '2018-06-05 11:48:28',
`delayed_jobs`.`locked_by` = 'delayed_job.2 host:ip-10-203-174-216 pid:3226'
WHERE ((run_at <= '2018-06-05 11:48:28'
AND (locked_at IS NULL OR locked_at < '2018-06-05 07:48:28') OR locked_by = 'delayed_job.2 host:ip-10-203-174-216 pid:3226')
AND failed_at IS NULL)
ORDER BY priority ASC, run_at ASC
LIMIT 1;
DelayedJob updates the locking information (timestamp and PID) when processing jobs. However, this UPDATE call in the database does not use the index in the table, at least for old MySQL versions (5.6 or below). As the number of entries in the queue increases, this UPDATE call becomes much slower.

This is the problem with database-backed asynchronous queues: the database is used both as a state manager and the queue storage/retrieval, resulting in locking.

Emergency Processing

Since the queue processing is becoming really slow, some critical tasks were not being performed. Thus we needed to run some jobs manually (using the Ruby/Rails console). We can invoke a DelayedJob worker manually using this command:

Delayed::Worker.new.run(delayed_job_object)

However, we may want to run all tasks in a given queue, let’s say the important_queue. We can query the database for all tasks under the queue and invoke the worker manually for each:

Delayed::Job.where(queue: "important_queue").find_each do |dj|
  Delayed::Worker.new.run(dj)
end

In this manner we were able to quickly resolve some critical tasks that needed to be run immediately. However, this is not a scalable solution as everything is done manually. This also won’t solve the problem of having hundreds of thousands of tasks in the backlog.

Queue “Storage”

Searching the internet, I found that there were others who also encountered this problem. Their solution was documented here and here. The main gist of the solution is to temporarily remove most (or all) of the items in the delayed_jobs table into a separate table to “unclog” the background queue.

In this example, we will create a new table called delayed_jobs_storage with the same columns as the original delayed_jobs table. The examples also assume we are using MySQL as our database:

CREATE TABLE delayed_jobs_storage LIKE delayed_jobs;

Once the “storage” table has been created, we can now move the jobs into that new table. In this example, we will limit the query to only move jobs that are under the huge_queue queue.

INSERT INTO delayed_jobs_storage (SELECT * FROM delayed_jobs WHERE queue='huge_queue');

Then we remove the jobs that we moved from the original delayed_jobs table:

DELETE FROM delayed_jobs WHERE queue='huge_queue';

At this point, the background processing speed returns to normal as the size of the table is now greatly reduced. The next step is to gradually move back some jobs from the delayed_jobs_storage table into the delayed_jobs table so they are processed.

This involves some trial and error as we want to determine the optimal number of jobs that we can transfer. We want it so that we can move the largest amount of jobs without slowing down the queue. In my experiment, I determined that we can transfer up to around 100k jobs back to the queue without impacting the performance.

To move the first 100k jobs back into the delayed_jobs table:

INSERT INTO delayed_jobs (SELECT * FROM delayed_jobs_storage ORDER BY id ASC LIMIT 100000);

Then we need to remove those jobs from our “storage” table:

DELETE FROM delayed_jobs_storage ORDER BY id ASC LIMIT 100000;

We wait until all the jobs have been processed and the queue goes back to its minimal state. After which we repeat the process again until all of the jobs stored in delayed_jobs_storage have been moved back to the delayed_jobs table.

Afterthoughts

While this workaround will get you out of a bind when your backround queue is clogged, it is not a long-term solution. As much as possible we want to avoid this scenario happening in the first place!

Here are some ideas that you can implement:

  • Analyze each background job to see areas of optimization. If the code that is running in a job is not optimized, it will run slower and will consume more resources. Check your database queries and your code performance to make sure they are running as fast as possible. For example, add table indexes and remove N+1 queries.
  • Reorganize how you add jobs to the background queue. Sometimes we just add tasks to the queue without thinking about how it impacts the rest of the jobs. Can you make your code add less to the queue by removing redundancy? Does combining smaller jobs into a larger job make sense? Are longer-running jobs of lower priority than faster ones?
  • Consider moving to a Redis-based solution such as Sidekiq. This will make sure that your dependency to your main database is eliminated and allows you to use a separate (and more efficient) storage of your background jobs.

Photo by James Pond on Unsplash


Late-to-the-party guide to Vim and Tmux

Late-to-the-party guide to Vim and Tmux

In my first job we used Emacs as our main text editor. However, I have no idea how to use it properly so I just used it more like Notepad++ than Emacs. In our team there is one person who refused to use Emacs, instead he was using vi (without the m!). To be honest, it looked painful watching him edit code with no syntax highlighting, no line numbers, and no plugins whatsoever. We tried constantly to convince him to use Emacs but he always refused and stuck to using vi. I thought the guy was crazy.

Fast forward 12 years in my career. I was attending a Ruby conference with my peers and one of the speakers (Brad Urani) demonstrated zshell, vim, and tmux and how he does development in his machine. It looked cool! Some of my peers also uses vim and tmux so its not a new concept to me, however I always decided to use gedit all these years. This time, they probably thought I was crazy.

After the conference I finally decided to jump to the other side. I will no longer use any text editor or IDE for programming and will force myself to use vim exclusively. I also decided to use tmux instead of relying on the guake terminal for more awesomeness.

After two months, am I very pleased with the results: I now have my development environment set up using zshell, vim, and tmux and all the tools that I used to have before have been configured to work on vim. As I feel like I am years (maybe decades) late to the party, here is a simple guide I wrote to help people like me who want to dive head-first into vim and tmux.

ZShell

This step is not really required to use Vim and Tmux, but it is recommended due to several improvements and plugins that you can use to improve your development environment.

In this guide, I will be using Ubuntu (or other Debian based systems) so I can be lazy and just install it using the package manager:

sudo apt-get install zsh

You can also check the version of the zshell installed to make sure its compatible with the plugins you want to use later on:

zsh --version

Once zshell has been installed, we will want to make it our default shell (instead of let’s say bash). This will make your system use zshell when you invoke the terminal or the command line.

chsh -s $(which zsh)

When you load zshell for the first time, it needs to be configured first and it will prompt you on how to do the initial configuration:

This is the Z Shell configuration function for new users,
zsh-newuser-install.
You are seeing this message because you have no zsh startup files
(the files .zshenv, .zprofile, .zshrc, .zlogin in the directory
~). This function can help you with a few settings that should
make your use of the shell easier.

You can:

(q) Quit and do nothing. The function will be run again next time.

(0) Exit, creating the file ~/.zshrc containing just a comment.
 That will prevent this function being run again.

(1) Continue to the main menu.

(2) Populate your ~/.zshrc with the configuration recommended
 by the system administrator and exit (you will need to edit
 the file by hand, if so desired).

--- Type one of the keys in parentheses --- 2

To make things simpler, we can use option (2) to auto-generate the zshell configuration file .zshrc. You can edit it later if needed.

Aliases

Aliases are command shortcuts that you can use to speed up your work by allowing you to type less characters to perform common tasks. An example of an alias is this:

alias work="cd ~/Desktop/WORK"

When this alias is loaded, whenever you type work in your terminal, it will automatically go to your work folder instead of manually typing the entire command. This particular example is very simplistic, but you can create more complex aliases to suit your workflow.

In order to create aliases, we can use a common file like .aliases to store all of our aliases. This is useful so we can just load this file into a shell’s configuration file, meaning we can have the same aliases set up whenever we use bash or zshell or any other shell.

First, create a hidden file called .aliases in your home folder:

touch ~/.aliases

Edit this file as needed, adding an alias line for every alias we want to set up. Next we will load this into zshell by editing the .zshrc file that was generated in the previous step and adding this line:

source $HOME/.aliases

This will then instruct zshell to load your aliases file whenever your shell starts.

Tmux

Tmux is a terminal multiplexer, which is a tool used for managing multiple separate terminal sessions inside a single session. Tmux provides an elegant way of managing multiple terminals such has text editing, SSH sessions, starting local servers, etc. Personally I find it very useful as I can switch context inside terminals very quickly using keyboard shortcuts, but it is much more powerful than that.

Before we can install tmux from source, we need to install the following dependencies:

sudo apt-get install libevent-dev
sudo apt-get install libncurses5-dev libncursesw5-dev

Then we download the tmux source code:

wget https://github.com/tmux/tmux/releases/download/2.6/tmux-2.6.tar.gz

We unpack the compressed file and go to the decompressed folder:

tar xvzf tmux-2.6.tar.gz
cd tmux-2.6

Then we build the installation and install it in our system:

./configure && make
sudo make install

We then invoke tmux using the following command:

tmux

Tmux Configuration

Just like in zshell, we can customize how tmux behaves using a file in our home directory called .tmux.conf. Here I will show you some common useful configuration to get you started quickly. These can be found in my own tmux configuration here https://github.com/marvs/dotfiles/blob/master/.tmux.conf.

The default command prefix is Ctrl+b. Now if you try it in your keyboard, its quite hard to do as you may need to use two hands to do this. This is a problem since this command is going to be used as a starting sequence for several other commands. It is therefore useful to bind this into an easier sequence (which can be done in a single hand), such as Ctrl+a.

# sets prefix to Ctrl-a
set -g prefix C-a
unbind C-b

We also need to instruct tmux to load our favorite shell instead of the default system shell. In this case we will set it to zshell.

# sets shell do the default user shell
set -g default-shell /bin/zsh

Tmux can have issues displaying colors in the terminal, so we instruct it to use 256 colors. This is essential for syntax highlighting such as when using vim.

# 256 colors
set -g default-terminal "screen-256color"

If you are using tmux for the first time, you will notice that you can no longer use the mouse to interact with the terminal. This may be useful as it forces you to rely on keyboard shortcuts and commands to do the things that you want. In the hands of an expert, this results in lightning-fast terminal interactions as compared to using the mouse.

However, as I am lazy I prefer to have a mouse fallback in case I get stuck in what to do next in my terminal. To do this, we can enable mouse integration (and scrolling) in tmux.

# Enable mouse integration
set -g mouse on
# Sane scrolling- I don't know how this works
set -g terminal-overrides 'xterm*:smcup@:rmcup@'

One thing I immediately noticed is I can no longer copy and paste using the clipboard when the terminal is inside tmux. The solution for this is to hold the SHIFT key before selecting the text you want to copy. Then you will have your copy/paste mechanism working as it was when you are not using tmux.

Tmux scripts

One feature of tmux that I appreciated is that you can now create your tmux sessions and windows/panels programmatically using a shell script. An example of this script (that I personally use) can be found here:

https://github.com/marvs/dotfiles/blob/master/dev-tmux

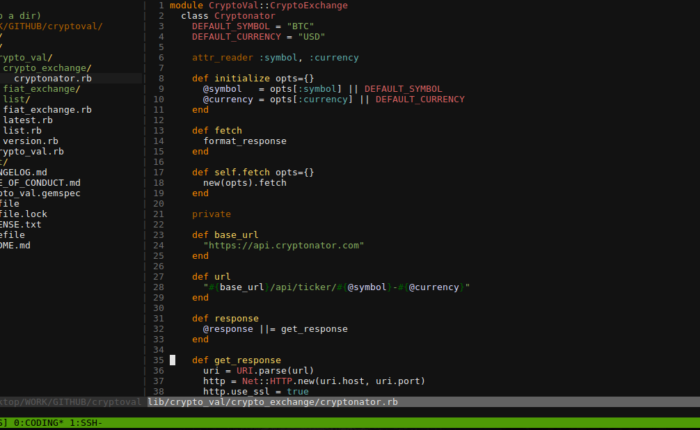
Basically, what this script does is it will create 2 windows, one called CODING and one called SSH. The CODING window has only one pane as it will be mainly used for text editing. The SSH window is divided into three panes, where you can run your local servers or access remote servers.

Once tmux is set up, invoking your custom development terminal session becomes as simple as running the script:

./dev-tmux

Useful Commands

Here are some of the tmux commands/keybinds that I commonly use in my work:

  • Ctrl+a n – move to the next window (e.g from CODING to SSH)
  • Ctrl+a p – move to the previous window (e.g. from SSH to CODING)
  • Ctrl+a arrow keys – move to the top, bottom, left, or right panes
  • Ctrl+a (hold) arrow keys – resize the pane in a particular direction

Vim

Vim stands for Vi IMproved. As the name implies, vim is an improved version of the basic vi editor, enabling new ways to interact with the text, advanced plugin support, and more.

To install vim, we can use again our favorite package manager:

sudo apt-get install vim

Configuration

As you may have guessed by now, vim is configured using a file called .vimrc, which also resides in your home folder. Here are some examples of useful configuration you can use:

To enable syntax highlighting:

syntax on
filetype plugin indent on

To make backspaces, tabs, and indents work like your favorite IDE:

set backspace=indent,eol,start " more powerful backspacing
set tabstop=2 " Set the default tabstop
set softtabstop=2
set shiftwidth=2 " Set the default shift width for indents
set expandtab " Make tabs into spaces (set by tabstop)
set smarttab " Smarter tab levels

Make the vim tab name the current filename (useful to get context when you have multiple tabs open):

let &titlestring = @%
set title

As a safety mechanism, vim creates swapfiles (temporary hidden files) when you edit a file. However, this can be problematic if you are using a version control system such as git as these files will be shown as newly added files. For this, you can move the swapfiles generated by vim into a directory outside your working directory:

set swapfile
set dir=~/tmp

To highlight the selections in your view when you search for it:

set hlsearch

To show line numbers:

set number

Plugins

One of the best features of vim is its extensibility and customization using plugins. There are several plugin managers out there that can handle installing and configuring plugins within vim, but in this article we will use vim-plug.

https://github.com/junegunn/vim-plug

To install vim-plug, just download the plug.vim file into your vim installation:

curl -fLo ~/.vim/autoload/plug.vim --create-dirs \
    https://raw.githubusercontent.com/junegunn/vim-plug/master/plug.vim

You can now specify the plugins in your .vimrc file, like the following:

call plug#begin('~/.vim/plugged')

Plug 'scrooloose/nerdtree'
Plug 'scrooloose/nerdcommenter'
Plug 'junegunn/fzf', { 'dir': '~/.fzf', 'do': './install --all' }
Plug 'junegunn/fzf.vim'
Plug 'tpope/vim-endwise'

call plug#end()

And then when you invoke vim, install the plugins you specified in your .vimrc file

:PlugInstall

Once you have the plugins installed, you can also configure the keyboard shortcuts to use those plugins. As an example, you can put these additional configuration in your .vimrc file:

map <C-n> :NERDTreeToggle<CR>
nnoremap <C-f> :FZF<cr>
nnoremap <C-t> :tabe<cr>

With this configuration, I can open a file tree view using CTRL+n, do a fuzzy search using CTRL+f, and open a new tab using CRTL+t.

Make sure you only add configuration that makes sense to you! Copying other people’s configuration may or may not be helpful depending on how you want to use vim.

Final Thoughts

I have been using this setup for months now, using vim as my main editor when working with code (instead of gedit). The first week(s) are difficult as this is the time that my hands are still getting used to the keyboard shortcuts used by tmux and vim. However, once you get the hang of it, I find them enjoyable to use.

One advantage that I gained is that I no longer use my mouse or my trackpad when coding, meaning my hands no longer need to travel away from the keyboard when working.

Another advantage of this setup is that it has a tiny resource footprint compared to more popular IDEs like Atom, Sublime, or VSCode. This advantage was highlighted when I tried to use one of my netbooks to do some light coding. This netbook has limited CPU and memory, and loading an editor or an IDE in this machine results in poor performance. Setting up tmux+vim in this machine breathed new life to the machine, as everything is just running inside a terminal!

I recommend that you give this setup a try as well and see if it makes sense in your workflow. As with most things, do them not because they are popular or “cool”, but because it makes sense in your work.

Protect Your Online Accounts

Protect Your Online Accounts

Data breaches are a common occurrence nowadays, with larger and larger personal data being exposed to the public and the hands of malicious organizations. Big companies such as Yahoo, LinkedIn, and Equifax are not immune to these data breaches and resulted in exposing millions of customer accounts. In the Philippines we also experience these data breaches, recently in COL Financial (online stock brokerage) and in Jobstreet (job board). Therefore it is important for you to protect your online accounts to minimize the damage caused by these data breaches.

I personally have accounts in COL Financial and Jobstreet, and so the reported data breaches served as a wake up call for me to take steps into securing my own account. In this article I will share some ways on how to protect online accounts in a practical way.

No online service is 100% immune to data breaches, and so we take a mindset that all of the services we use online will eventually have a breach. It is not a question of how, but when the attacks will occur. Companies have a daunting task of needing to be always one step ahead of the attackers. There are many ways an attacker can gain access to customer data in an online service, such as:

  • Technical breach – Attempting to access the service itself and gain access to the data by guessing passwords
  • Backdoor programs/vulnerabilities – Installing programs in the servers that provide access to the attackers from the inside. Also if the servers are not updated to the latest versions, there may be existing vulnerabilities that can be used by the attacker to gain access to the system
  • Social engineering – A coordinated attack using email, social media, and other means of communication that aims to gather credentials and other sensitive information from customers or company employees

Here are some ways on how we can protect our online accounts:

Generate Strong, Random Passwords

You have probably heard this one over and over again through blogs, books, articles, news, and signup forms. Usually when you sign up for a website they check the password that you create and see if its a “strong” password. Typically they require you to have lowercase, uppercase, symbols, and numbers in your password.

While these measures are good in that they force users to generate passwords that are somewhat hard to guess, this results in passwords that are hard to remember and thus it may prompt the user to write down or save the passwords on another medium, such as a spreadsheet, a text file, or a sheet of paper. This reduces the overall security of the account as all the passwords can be stolen physically or digitally without even attacking the website itself.

To combat the tendency to write down passwords in an insecure location, let’s explore another way of generating a strong password that can be also easily remembered.

There was an XKCD comic that illustrated the difference between a password using special characters, numbers, and multiple cases and a password that is composed of completely random words. It showed that a seemingly random password that uses special character substitutions to obfuscate the actual password is quite difficult to remember but is quite easy for a computer to guess. In contrast, a password composed of purely random words can be easily remembered but has a high entropy such that it is difficult for a computer to guess.

To make the point clearer, let us use one of the many password generators using this “XKCD” approach, such as xkpasswd.net. This website allows you to generate random passwords, including the ones described in the comic. For simplicity, you can load this config into the website to preset some settings and generate some passwords quickly:

{
 "num_words": 4,
 "word_length_min": 4,
 "word_length_max": 6,
 "case_transform": "NONE",
 "separator_character": "-",
 "padding_digits_before": 0,
 "padding_digits_after": 0,
 "padding_type": "NONE",
 "random_increment": "AUTO"
 }

Using this configuration, here are some of the passwords that were generated:

raise-family-often-future
town-find-late-public
plant-leader-storm-suffix

To illustrate how we can easily remember these passwords, think of how you can connect or relate each of the words, and then create a story that you can memorize in your head.

For example, the first password can be remembered as the sentence “When you raise a family, you often think of the future“. I can assume that after reading that sentence twice, you will have already memorized the password!

The second password can be remembered as the sentence “When you go to town, always find the late(st) public transport”. The third password is definitely harder to connect and relate to each word compared to the first two, but I will leave it as an exercise to the reader 😀

When using this approach for password generation, there is one important rule: the words must be completely random. It is not enough that you think of different words from your head. Even though you think the words are random, it is still going to be influenced by your thoughts and subconscious mind and this results in a password that is not strong enough.

When attackers combine other information about you, they may use that information to guess the word combinations that you are likely to use. Therefore it is important to use external, unbiased tools to generate the word combinations for you instead of creating them yourself.

Use a Password Manager

Even when using rememberable passwords, due to the many websites that we access on a daily basis, it can be hard to track and remember the password that we use for each website. Because of this sometimes we list our passwords either in paper (physical) or in a text file (digital). This results in a situation wherein if an attacker gains access to that file, many accounts that you have can be compromised.

This is where password managers come in. This article describes how password managers improve your account security and the considerations for using them.

Use Multi-Factor Authentication

Multi-factor authentication provides an additional layer of security by requiring a unique code or link for the account in addition to the account password. A common implementation of this is two-factor authentication (2FA) which you may have already encountered on websites that you use. Due to the increasing occurrence and severity of data breaches, many websites implement 2FA and recommend users to enable it for their accounts.

SMS Authentication

A familiar method of implementing 2FA is by requiring users to connect their mobile number to their account. Whenever you log in to your account, the service sends a unique code to your phone via SMS. This code is needed in addition to your password to be able to access your account.

The way this increases security is that it provides a separate authentication mechanism. If an attacker was able to guess or hack your password, they will still not be able to access your account as long as they do not have access to your mobile number or phone.

One problem with the SMS 2FA implementation is that it is not completely secure. Even though we may think that SMS is secure as you need to have your phone or SIM card in possession before you can receive the message, this is not the reality. SMS messages are not encrypted meaning it is sent in plain text between networks. Anyone with the capability can intercept those SMS messages or spoof your SIM card and acquire your 2FA code.

If an attacker knows both your password and your mobile number, they can technically gain access to your account even though you have 2FA enabled.

Authentication Applications

A more secure way of receiving 2FA codes is by using an authentication app. These are mobile applications that can generate unique codes for each service that you use. Some popular examples are Google Authenticator, Authy, and Duo. Using these applications are convenient as most of the time you can just scan a barcode and your secure codes will be set up automatically.

Some advantages of using an authenticator app compared to using SMS are:

  • The authenticator app can work even if you are offline or does not have access to the mobile network. If you are using SMS codes, you will not be able to receive the codes if you do not have access to the mobile network.
  • The authenticator app provides the codes instantly. When using SMS, there could be delays before you can receive the 2FA codes depending on network load and congestion.
  • 2FA codes generated using the authenticator app cannot be intercepted as these codes use a unique secret key that is saved on the device.

The last point is the main reason why using an authenticator app is secure. Since there are no data being transmitted when you are using the app (as you can use it offline), then no one will have access to your 2FA codes (unless they have physical access to your phone or your phone itself is compromised).

Whenever you change your mobile device though, you will need to set up those 2FA accounts manually again for all services that you use since the unique codes are tied to a specific device. While I have seen users complain about this as they cannot transfer the authenticator app credentials to a new device, I think this is an important security feature. This illustrates the fact that your 2FA codes are kept safe as long as the device itself is not compromised.

Final Thoughts

There are many ways that you can do to secure your online accounts. The items listed above is not intended to be an exhaustive list, but doing them will already increase your protection significantly. In this time and age of prevalent digital usage and information available to more and more people, we cannot afford to be complacent in our data security.

Photo by Markus Spiske on Unsplash

Why I finally decided to use a Password Manager

Why I finally decided to use a Password Manager


For quite some time now I had been hesitant to use a password manager. Even though I knew that it is a security best practice, I feel that entrusting all your passwords to one program or organization is scary. This feeling changed recently amid increasing occurrence of data breaches and the amount of data that is being divulged. These events and reflecting how I actually use passwords finally drove me to install and use a password manager.

Password managers are programs that store your passwords in a secure and encrypted format. They also provide tools such as random password generators to make it easier for you to generate secure passwords. These programs can be installed locally in your computer or in the cloud and accessed through the internet.

Using a password manager allows you to “forget” your passwords for websites that you use by making the program handle filling up the login form. This solves the problem of reusing passwords for different websites, which is a big security risk.

I would like to illustrate the risk that you face when you do not use different passwords for different websites. The table below shows a sample user account and the passwords for some commonly-used websites:

Facebook
Username: [email protected]
Password: mySeCurePWD123!

LinkedIn
Username: [email protected]
Password: mySeCurePWD123!

SSS.gov.ph
Username: [email protected]
Password: mySeCurePWD123!

The password appears to be secure as it satisfies most of the password requirements today: 8 characters or more, a mixture of uppercase and lowercase, and uses numbers and special symbols. The user also has an easy time remembering the password as they are the same for everything.

However, since the user used the same password for all of the websites, then the risk that an account is going to be compromised depends on the least secure website. For example, let’s say SSS.gov.ph (a government website) stores its passwords in plain text and it suffered a data breach. Attackers now have your actual password based on the data that is divulged. They can try and use the same username/password combination in Facebook and LinkedIn and they will be able to gain access to your accounts in there as well.

As another example, let’s say that the user’s passwords are not the same but it uses some kind of service identifier. This provides an illusion for the user thinking that the passwords are different, but it is really easy to guess provided that one of those passwords gets hacked.

Facebook
Username: [email protected]
Password: mySeCurePWD123!_fb

LinkedIn
Username: [email protected]
Password: mySeCurePWD123!_linkedin

SSS.gov.ph
Username: [email protected]
Password: mySeCurePWD123!_sss

Again in the event that the SSS.gov.ph website gets hacked, the attacker will be able to determine that the user is using an identifier to differentiate the passwords. In the example above, they can guess your password in Facebook using possible identifiers such as mySeCurePWD123!_facebook, mySeCurePWD123!_fbook, and mySeCurePWD123!_fb. They can use the same method for determining your LinkedIn password.

As a final illustration, consider the case where the passwords are totally random and is not based on any information about the user or the service.

Facebook
Username: [email protected]
Password: RxgrXvczlaGlG0w!5TQoQ

LinkedIn
Username: [email protected]
Password: Uv8E&9bGCgj%$9%GSV6BA

SSS.gov.ph
Username: [email protected]
Password: *$76217wlZcC2C9nP8i$W

As you can see, even if the least secure website (let’s say SSS.gov.ph) gets hacked, then your passwords in Facebook and LinkedIn will remain un-guessable. Another way to add even more security is to use different usernames or emails in different accounts, so hackers will need to guess both username and password. Implementing this may not be practical for most users though.

This is one of the main benefits of using a password manager. By making it easy to generate and fill up random passwords for different websites and services, you no longer need to manually track and remember each individual password and so the overall security of your accounts increase.

For my previous concern about putting all your passwords in one program: in my opinion the benefits of using a password manager definitely outweighs the risks. Having non-random passwords make all of my accounts insecure and an attacker only needs to hack the weakest link in the chain for the whole thing to get compromised.

Password managers have a single mission compared to other web companies. While other companies can have sufficient security features, this is not the primary aim of their company and business. Password managers on the other hand only have this single focus of making sure that the entire system is secure. They are aware that one critical vulnerability or a data breach in their systems will immediately destroy their business.

Types of Password Managers

We can categorize password managers into two types:

  • local installation – these are password managers that you install directly into your computer. They save your encrypted passwords locally which means within the computer itself. This is a secure setup as all files relating to your password is directly tied to your local device and thus an attacker needs to obtain your device first before they can access your encrypted passwords. Even though they can obtain those files though, they will not be able to decrypt them without your secret key.
  • web-based – these are password managers that handle your data in remote servers instead of saving them locally. This is a setup that is very easy to use and convenient as you can access your passwords on any device that you use as long as you know your secret key (also known as the master password). However, your password information (while itself encrypted) is being transmitted through the internet into the remote servers which pose a small risk of an attacker intercepting those information.

A probably simple (but not entirely accurate) analogy is like having a physical vault that contains money. A local installation is like hiding that vault inside your house. No one will have access to that vault unless the person is inside your house, and they cannot unlock it unless the person knows your secret combination. Thus the security of the vault is dependent on the security of your house and the security of your secret combination.

A web-based password manager is like giving your vault to a bank and letting them handle it. In this case the security of the vault is going to be dependent on the security of the bank itself and the security of your secret combination. While we can assume that the security measures in a bank is tighter than that of your house, we do not have control on how the bank handles its business and the people that can gain access to your vault.

Things to Consider

There is an important consideration when looking for a password manager. Security may need to be balanced with ease of use and convenience.

Web-based password managers such as LastPass offer a very convenient way to handle your password through browser integration. This means that it pre-populates your username and passwords on websites that you use, and also have a built-in way of generating secure passwords every time you sign up for a service. It will also prompt you to add a website into the LastPass vault automatically and it saves your username and password without you manually providing that information to the program.

Locally-installed password managers such as KeePass do not have the same ease of use and convenience compared to web-based programs. However, locally-installed programs can be more secure as long as properly set up and maintained. KeePass also has plugins that can sync your encrypted password database into other remote file storage (like an FTP server or Dropbox) which can be useful to make sure that you do not lose your data in the event of a computer malfunction or erasure. However, syncing your data outside your local machine now introduces the same risk as a web-based service as your files are no longer exclusively present locally.

Protect your Password Manager

This should not be a reason to be complacent though and just delegate your account security into password managers. We still have a personal obligation to keep our information secure. Here are some tips on making sure you maximize the benefits you get from using a password manager:

  • Make sure that your secret key or master password is kept safe and is truly random.
  • Implement an auto-lock/screensaver in your computer when you are away.
  • Always log out of websites afterwards. Using a browser-integrated password manager automatically fills up the login form so anyone with access to your computer can log in to your account.
  • Remember to log out of the password manager after you are done browsing and before you close your computer.
  • Use Two-Factor Authentication (2FA) for all websites that you use if they offer the capability. This greatly increases the security of your account. If the password manager also supports 2FA, then it is important that you enable it as well. This provides an additional layer of security on top of your master password.

After discussing the rationale and benefits of using a password manager, I hope that you also consider using it yourself. In today’s age where a large number of services we use and transactions we do are now done using the Internet, it is more and more important that we keep our data secure.

Attacks are becoming more sophisticated, most often linking information from various sources to gain more information about you. Not following data security practices not only has a negative effect in our digital lives, but in other aspects of our life as well. Having secure passwords reduce that risk by making it harder for attackers to gain information about us even though an insecure website gets compromised.

Photo by MILKOVÍ on Unsplash