In the Introduction to Docker article, we developed a good basic foundational knowledge about container technology. Now, we will take it one step further by creating and running a Rails 6 application exclusively using Docker. As of this writing, Rails 6 is the latest version of the Ruby on Rails web application framework.
Generating the Rails code
We learned previously that we can run Ruby code using Docker even without having Ruby in our local machine. We can also use the container’s shell and run commands directly in the container. Using these, let’s try to perform some commands in a container running Ruby 2.7:
docker run -it --rm -v ${PWD}:/usr/src/app ruby:2.7 bash
The -i and -t flags (combined as -it) is necessary to be able to use the container’s shell. In this case, we also use the -v flag (volume). What is it for?
Docker Volumes
Docker provides a mechanism for storing data without being coupled to a specific container. Containers should be treated as ephemeral, meaning they can be created and destroyed at any time. Thus, we should not store data inside a container as it will also get deleted once that container is destroyed.
Volumes work by mounting it into a container. In the example above, we set it as:
-v ${PWD}:/usr/src/app
This means that the current directory is going to be mounted into the container under the path /usr/src/app. You can mount it as a readonly volume or not. For our purposes, we need it to be writable (the default) as this is where our Rails application is going to run.
Installing the Rails gem
We need to prepare the project directory in our local machine. For example, we will create our Rails application under a projects folder:
mkdir -p ~/projects
cd  ~/projects
Then we run the command to use the bash shell of a Ruby 2.7 container:
docker run -it --rm -v ${PWD}:/usr/src/app ruby:2.7 bash
Great! Now we can access the shell and run commands inside the container. Note that the default Docker user is root, so all commands here will run under the root user.
root@container_id:/# cd /usr/src/app
root@container_id:/# gem install rails
Since we are using a Ruby container, RubyGems is already installed by default and so we can use the gem command immediately.
Javascript Dependencies
Rails 6 comes with a gem called webpacker, which is basically a Ruby wrapper for the webpack library. Webpacker requires yarn (an alternative to npm) and most Javascript libraries require Node to be installed as well. Thus we will need to install these first in the container before we proceed with creating our project.
# Add the Node source
root@container_id:/# curl -sL https://deb.nodesource.com/setup_14.x | bash

# Add the yarn source
root@container_id:/# curl -sS https://dl.yarnpkg.com/debian/pubkey.gpg |    apt-key add -
root@container_id:/# echo "deb https://dl.yarnpkg.com/debian/ stable main" | tee /etc/apt/sources.list.d/yarn.list

# Install Node and yarn
root@container_id:/# apt-get update -yqq && apt-get install -yqq --no-install-recommends \
     nodejs \
     yarn
Now that we have Node and yarn installed, we can now create our Rails project. In this example we will skip generating tests as we will use RSpec instead.
root@container_id:/# rails new myapp --skip-test
After initializing the Rails application, it will then try to run bundle install to install the gem dependencies. As we have already installed Node and yarn earlier, there should be no errors at this point.
Next we go to the application folder and setup Webpacker.
root@container_id:/# cd myapp
root@container_id:/# rails webpacker:install
We now have the initial code for our Rails application. However, as the default Docker user is root, all of the generated files are also owned by the root user. This is not ideal as we need these files to be under our user account. To do this, we need to exit the container and change the permissions for the entire application folder.
root@container_id:/#  exit
sudo chown ${USER}:mygroup -R myapp
Replace mygroup with your user’s group (usually also the same as your username). Note that as we ran the container using the –rm flag, it will destroy the container once we have exited it. However as the current directory is mounted with the container’s /usr/src/app folder, the generated files should remain in the current directory of your local machine.
Dockerfile for Rails 6
We are able to set up our initial Rails application, but what we did is a LOT of manual steps. When we want to set it up on another machine or when someone else needs to, these steps need to be repeated again. This is where Docker shines. Let’s use it to make the whole process automatic and repeatable.
A Dockerfile is essentially a set of instructions for Docker on how to generate an image. Let’s take a look at what a Dockerfile looks like and then get into more detail on what each line means.
FROM ruby:2.7

RUN curl -sL https://deb.nodesource.com/setup_14.x | bash
RUN curl -sS https://dl.yarnpkg.com/debian/pubkey.gpg | apt-key add -
RUN echo "deb https://dl.yarnpkg.com/debian/ stable main" | tee /etc/apt/sources.list.d/yarn.list

RUN apt-get update -yqq && apt-get install -yqq --no-install-recommends \
     nodejs \
     yarn

COPY Gemfile* /usr/src/app/
WORKDIR /usr/src/app
ENV BUNDLE_PATH /bundler_gems
RUN bundle install

COPY . /usr/src/app/

CMD ["bin/rails", "s", "-b", "0.0.0.0"]
Base Image
FROM ruby:2.7
The FROM instruction specifies which image your custom image is based on. In a Rails application it is a good idea to use a Ruby base image so we already have Ruby/RubyGems installed. You can also opt to use a blank image, in which case you use “scratch” and then the instruction becomes (aptly named) FROM scratch.
As much as possible we want to keep our custom image size small. Your image is going to be downloaded by other developers, by your CI/CD pipeline, and everything that involves running your application. Having a small image size results in a faster development and deploy process. For this purpose, we have base images using the slim or alpine Linux distributions that only include basic libraries resulting in a smaller size.
Setup Node and Yarn
RUN curl -sL https://deb.nodesource.com/setup_14.x | bash
RUN curl -sS https://dl.yarnpkg.com/debian/pubkey.gpg | apt-key add -
RUN echo "deb https://dl.yarnpkg.com/debian/ stable main" | tee /etc/apt/sources.list.d/yarn.list
These commands look familiar as they are the exact same commands we ran earlier to generate our initial Rails project. We just added them to the Dockerfile so that these are automatically performed using the RUN instruction.
Install Dependencies
RUN apt-get update -yqq && apt-get install -yqq --no-install-recommends \
     nodejs \
     yarn
Now we install the dependencies for our application. We also used some best practices when adding items to the Dockerfile:
- Chain multiple commands in a single RUN instruction as much as possible. This will result in fewer layers when building the image. In the example we both ran the apt-get update and install commands in a single line.
- Another reason why it is a good idea to combine apt-get update and install in a single line is when you need to add more dependencies. If the update command is on a separate RUN instruction, this gets cached by Docker and will not be executed as there is no change in that line in the Dockerfile. This may result in installing out-of-date libraries.
- Use –no-install-recommends so that only critical library dependencies are installed. Apart from your application code, the installed libraries are another reason why a Docker image size gets large.
Install the gem dependencies
COPY Gemfile* /usr/src/app/
WORKDIR /usr/src/app
ENV BUNDLE_PATH /bundler_gems
RUN bundle install
The COPY instruction copies files from your local directory into a destination directory in the image. In our example Docker copies the Gemfile and Gemfile.lock files into the /usr/src/app directory in the image.
WORKDIR is essentially a change directory (cd) command and this means that all instructions below it will run on the specified directory in the image.
ENV sets an environment variable in the context of the image. In Docker, you use environment variables extensively to configure services and applications. In our example we set the Bundler cache directory in the image which will allow us to re-use this cache for faster gem installs.
All of these instructions enable us to finally run bundle install to install the gem depedencies. Now you may be thinking, “How can I copy and install stuff in the image when an image is supposed to be read-only?“.
Good question! In reality, building an image involves running containers, more specifically called intermediate containers. Each instruction in the Dockerfile involves running it in a temporary container before saving it as a layer in the image. By default, Docker deletes these containers when the final image is built so you don’t notice them, but you can also choose to keep them for debugging purposes.
Build Cache
Let’s discuss an important concept when building images. As you may have noticed by now, creating images can be a slow process. Docker tries to improve this by using a caching mechanism that enables reusing an existing image layer instead of creating a new one. It achieves this by checking each instruction in the Dockerfile and determining if there is a change from the previous version.
An important note here is that once there is a change in an instruction, the cache will not be used and the command will be executed again. If that happens, all of the succeeding instructions are executed again, regardless of whether the succeeding instruction is modified or not. This is done for image integrity as the state of succeeding instructions may be dependent on the result of the previous instruction.
You may be wondering why we are only copying the Gemfile and Gemfile.lock files in the image, instead of copying the entire application code. In practice, this will result in the same image, however, one nasty side effect is that your COPY instruction will almost always be flagged as modified.
Normally, Docker just checks if the specific instruction’s text was changed to determine whether it can use the cache or not. In the case of ADD or COPY however, the actual source files are checked if they are changed or not. This means that if you COPY the entire application code prior to running “bundle install”, then an application code change that is unrelated to updating gems will result in the succeeding instructions to not use the cache. This in turn runs the “bundle install” instruction when you change application code.
If we only COPY the Gemfile files prior to “bundle install”, then even if the application code changes, all of the instructions in the Dockerfile up to the point of “bundle install” will always use the build cache, resulting in a faster image build time.
Application Code
COPY . /usr/src/app/
This instruction copies the application code from the current directory in our local machine into the /usr/src/app directory of the image being built. This allows us to have the Rails binaries in the image as well as all the application configuration needed to run the Rails 6 application.
However, not all files in our code is needed to run our application. It is a good idea to exclude those files as it will make the application image larger than necessary.
Dockerignore
Much like .gitignore, Docker has something called .dockerignore. By creating this file in the root of your project, it will tell Docker to exclude those files when doing a COPY instruction. Here is an example Dockerignore file for our Rails application:
.git
.gitignore
log/*
tmp/*
node_modules/*
Obviously we do not want log files, cache and PIDs to be included in our image, as these are only needed when running the application. We also did not include the node_modules directory which contains all of the Javascript libraries we need for our project. If we are on a development environment, these will be installed on a per-container basis. On a production environment, we only need the Javascript bundle files and not the source libraries.
Default Command
CMD ["bin/rails", "s", "-b", "0.0.0.0"]
The final line in the Dockerfile indicates the default command that will be run once everything is set up. You will notice that the command is basically an array of strings like when you run split in a command. This format is called the exec form. This form is essential for Docker to be able to terminate the container cleanly.
In our example, we run the Rails binary to start the Puma server. We then bind it to all IP addresses. This is important once we are using Docker Compose, as Compose creates its own virtual network and thus it is not enough that we bind our service to just localhost.
Running our Rails application
Building the Image
Now that we understand all of the instructions in our Dockerfile, we can now build our custom image:
docker build -t myapp:1.0 .
This will create an image name myapp with a tag of 1.0.
Running the Image
Once we have our custom image built, we can now run it. The Docker run command creates a container from our myapp image. Then it starts that container with the default command, which in our case is running our application server.
docker run --rm -p 3000:3000 myapp:1.0
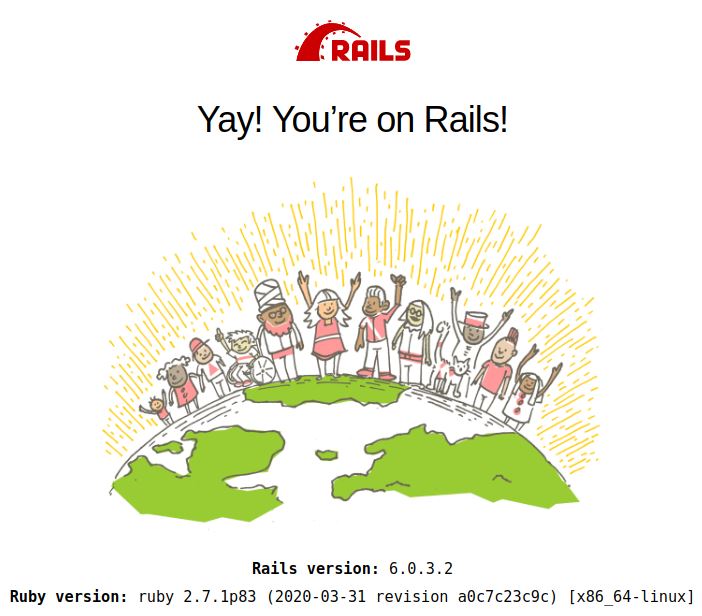
Notice the -p flag that we included in our command. This flag publishes a port from the container to the host (your local machine). This in turn allows us to access the container using http://localhost:3000 in the browser. If we do that now, you will see the familiar Rails welcome page!
Next Steps
Now that we understand how images are built and how Dockerfiles are used, we can take it to another level: Docker Compose. So far, we were only able to run the Rails application because it uses SQLite by default. Most of the time though we will need a full-featured database such as PostgreSQL. In this case, we will need to create a separate container to run our database.
Compose makes it very simple for us to map out what our entire application looks like. It also enables additional services to be integrated easily into our application, such as a Redis server, an Nginx proxy, and so on.
One thought on “How to build a Rails 6 application using Docker”